Integrating GNS3 and VirtualBox
Mon 9th Sept 13
Having come from a development background rather than a sysadmin one, my knowledge of layer 2 is not as good as I'd like it to be so I've decided to do something about it. I've always been interested in VLANs and the idea of bypassing them so thought that would be a good place to start.
Having two small children at home means having a bunch of physical routers and switches sitting about in my home office wasn't really an option as they tend to be noisy things so I set off on the quest to virtualize everything so it would be nice and quiet, easy to snapshot and portable. When I mentioned this on Twitter and asked for advice there were two schools of thought:
- Should be possible, no real reason why not
- Won't work, you can only virtualize routers and GNS3 doesn't handle switching well
Turns out it is possible and is actually pretty simple to set up. This blog post is going to cover setting up a basic lab with a few machines, a single switch/router and a couple of subnets. I won't cover any real attacks here because I've not actually done any yet, these will come later when I've got my head around what is going on, the different real life scenarios and the best ways to attack things.
I'll not be teaching how to use GNS3, VirtualBox or Cisco/IOS here but will include enough screenshots so that hopefully you can follow along even if you only have basic knowledge.
The Plan
This diagram shows the basic lab I'll be setting up:
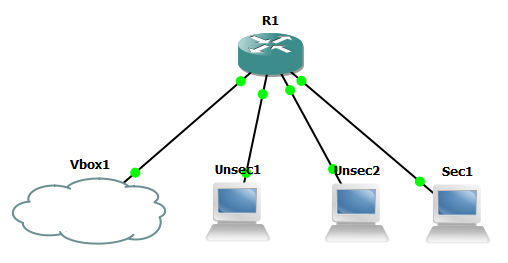
The idea is that Unsec1 and Unsec2 are two machines which share the same VLAN while Sec1 is a "secure" machine which will be sitting on its own VLAN. VBox1 is the VirtualBox machine which will be moved around VLANs for different attacks.
The Setup
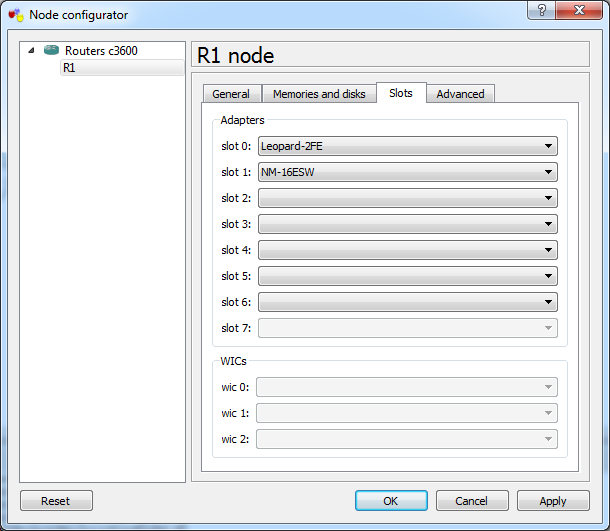
The first thing to do is to set the router up. I'm using a 3660 with the IOS image c3660-ik9o3s-mz.124-13b, I'm sure there are others out there which will work so if you don't have access to this image have a look around and hopefully you'll find one that works.
To enable the switch module right click router and select configure, in the slots I've added NM-16ESW to slot 1, other images might have different names here but you are looking for SW - switch.
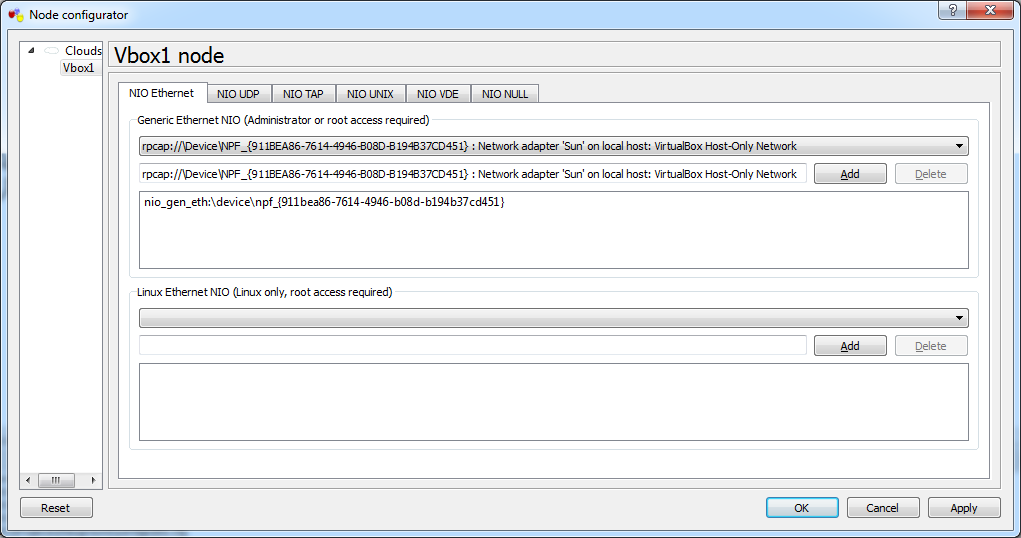
Next set up the cloud so it can be attached to the VirtualBox machine. To do this, go into its configuration box and in the NIO Ethernet tab find "VirtualBox Host-Only Network". Click add and it will appear in the box below. Save this and we will come back to it later.
Now set up the three machines so that each one is attached to its own machine in the Virtual PC Simulator console. This is the way I linked them up and the IP addresses I set:
Note, Sec1 is deliberately on a different subnet, this is because it will ultimately be on its own VLAN so will have its own address range.
| Machine | Local Port | Remote Port | Router Interface | IP |
|---|---|---|---|---|
| Unsec1 | 30000 | 20000 | f1/0 | 192.168.1.1 |
| Unsec2 | 30001 | 20001 | f1/1 | 192.168.1.2 |
| Sec1 | 30002 | 20002 | f1/2 | 192.168.5.1 |

Now, bring up the Virtual PC Simulator console, set the IP addresses and test the connectivity:
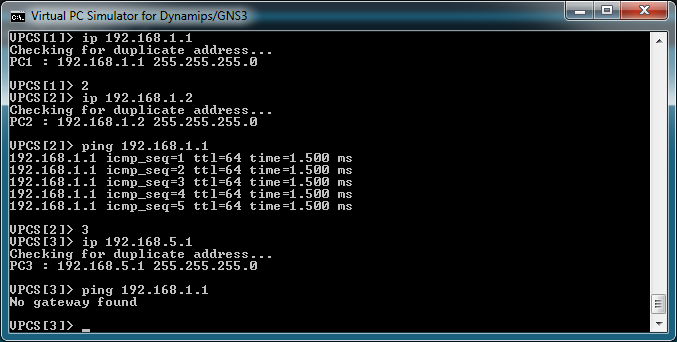
As expected, the two non-secure boxes can ping each other but the secure one can't ping them.
Now lets add in the VirtualBox machine. I built a fresh Debian stable box as I'm not expecting to do much more than basic networking with it at the moment. Once installed I added the vlan package so the VLAN tools were available when required. I then changed the network adaptor so that it was using Host Only mode and was connected to the VirtualBox Host-Only Ethernet Adaptor.
Now boot the box and check connectivity....
By default, Debian boxes use DHCP on eth0 and as you are on the Host Only network you'll probably get an IP on a 192.168 network but you are going to need to change this to so you are on the same subnets as the other machines. First kill the DHCP client then set a static IP on the 192.168.1.0/24 subnet.
killall dhclient
ifconfig eth0 192.168.1.100
I went a step further here and modified the /etc/network/interfaces file to automatically assign this IP to eth0, this isn't required but makes things a little easier and means you don't have to remember to kill the DHCP client when you reboot, something I've done and then wondered why all networking died.
Now we are on the 192.168.1.0/24 network it should be possible to ping the two non-secure machines and not the secure one.
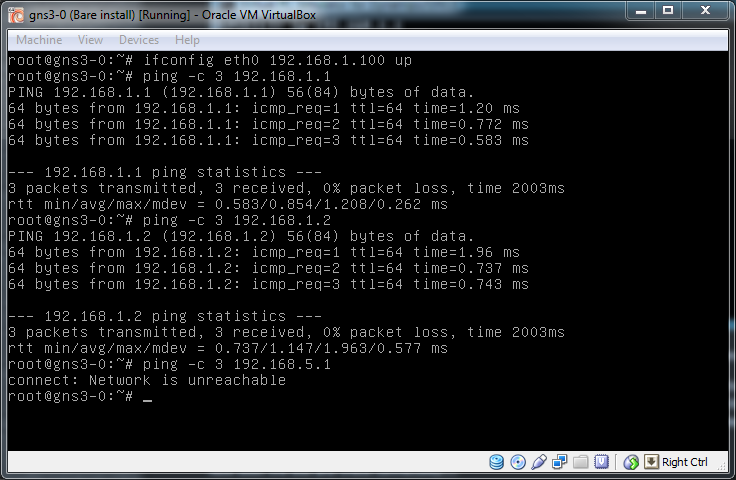
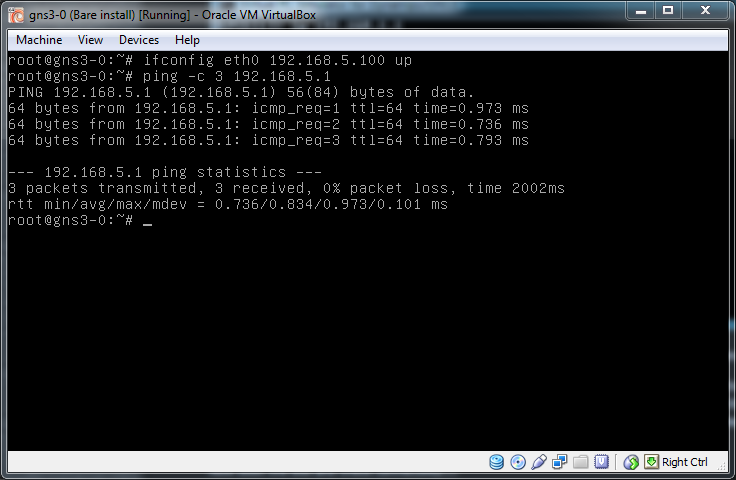
Just to check things are working, and to show that simply using different subnets on the same switch doesn't offer any security, change the IP to the 192.168.5.0/24 network and check that it is possible to ping the secure box.
Summary
We now have a working lab mixing GNS3 and VirtualBox, the network is up and running and there is connectivity. This is a good place to end this post and suggest you go off and snapshot the lab then have a play.
In part 2, Adding VLANs to the GNS3/VirtualBox Lab, I cover how to add VLANs to the lab and show how to move between them.

