Adding VLANs to the GNS3/VirtualBox Lab
Wed 11th Sept 13
Welcome to part two of my quest to learn more about layer 2 and its vulnerabilities. This post will be building on the lab started in Part 1 - Integrating GNS3 and VirtualBox so if you want to play along then you need to start there and get the basic lab set up first.
In this post I'll be adding VLANs to the setup and doing some simple switching between them.
The Plan
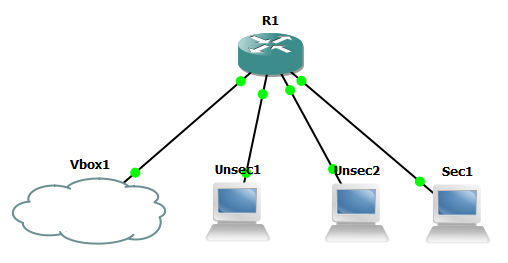
As a reminder, this is the setup already in place:
In this post we will be adding the following VLANs:
| Machine | Router Interface | IP | VLAN |
|---|---|---|---|
| Unsec1 | f1/0 | 192.168.1.1 | 10 |
| Unsec2 | f1/1 | 192.168.1.2 | 10 |
| Sec1 | f1/2 | 192.168.5.1 | 50 |
| Vbox1 | f1/3 | 192.168.1.100 | 10 |
Once they are in place I'll show how to move machines between them and prove that VLANs segregate traffic as they are designed to. I'll also then give an introduction to the difference between access and trunk ports and show how, if you can get on a trunk port, you can access whichever VLAN you want.
The Setup
First we need to tell the switch about the VLANs we want to use, the way to do this varies depending on what type of device you are on, on mine I do the following:
R1#vlan database
R1(vlan)#vlan 10
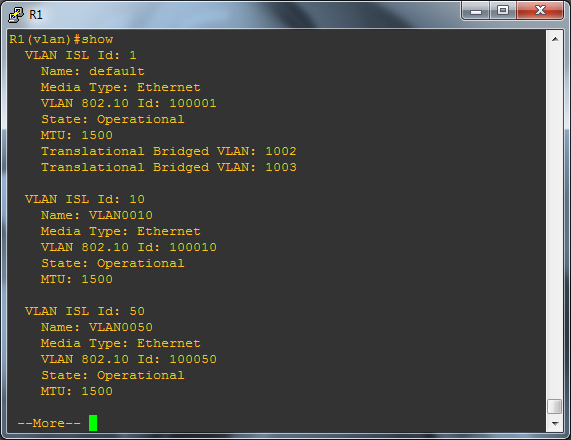
R1(vlan)#vlan 50You can check they were added OK by running:
R1(vlan)#show
None of this is saved until you exit out of this section of menus using the exit command, if when you try to do this you get the following error message:
R1(vlan)#exit
% not enough space on flash to store vlan database. trying squeeze...First create squeeze log by erasing the entire device

% error squeezing flash - (Missing or corrupted log)
Error on database apply 40: NV storage failure
Use 'abort' command to exit
You need to abort and then run the following:
R1#erase flash:You will be prompted to confirm you want to continue, say yes. You now need to go back into the VLAN database and re-run the commands from above, this time they should save without any problems when you exit.
Next go into the individual interfaces and assign them to the appropriate VLANs:
R1#configure terminal
R1(config)#interface fastEthernet 1/0
R1(config-if)#switchport mode access
R1(config-if)#switchport access vlan 10
Repeat this for each of the interfaces based on the table above, remember that f1/2 (Sec1) goes on VLAN 50, the rest on 10. You can check you've done all this correct when finished by returning to the enable prompt and running
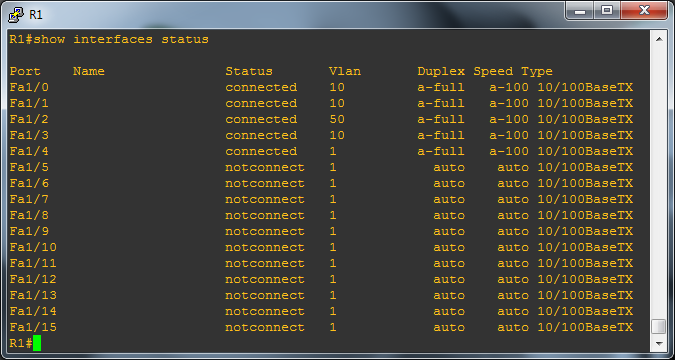
R1#show interfaces statusYou should see something like below, the key thing to check is that the interfaces are assigned to the correct VLANs as described in the table above.
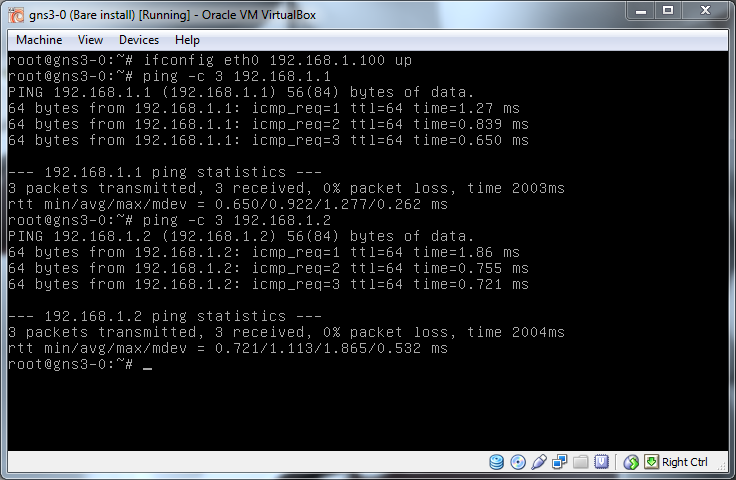
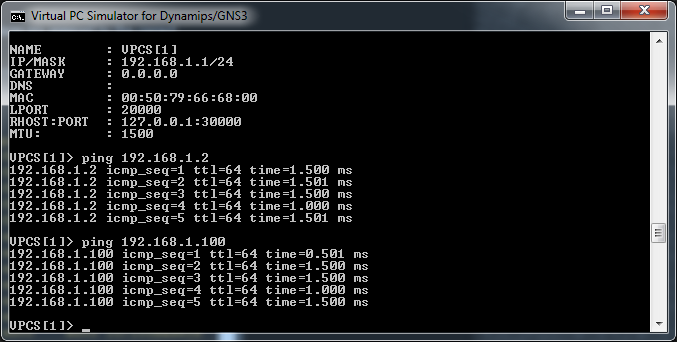
Give it a minute for the router to sort itself out and bring everything back up again and now its time to start ping testing again. First, can everything on the 192.168.1.0/24 subnet (VLAN 10) see each other?
Now we need to test to see if simply putting eth0 on the VirtualBox machine into the 192.168.5.0/24 network will allow communication:
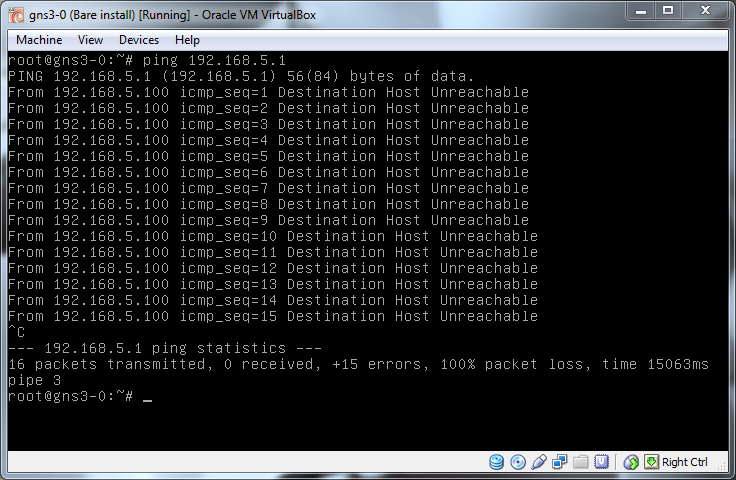
No, nothing, that's perfect, the VLAN setup is preventing traffic from getting from one subnet into another.
Before moving on, this is a perfect place to snapshot the lab. Cisco devices only hold their config in memory unless told to write them to disk (Something the city of San Francisco knows all about thanks to Terry Childs). This means that even if you save the GNS3 project as soon as the router is shut down it will forget all you've set up and you will need to configure it again. To store the config run the following command from the enable prompt:
R1#copy running-config startup-configSomething I've found, and this may just be coincidence or something odd on my set up, if you don't then save the GNS3 project the saved values are still lost after a reboot so as well as saving the config in the device do a save in GNS3 as well.
Now that is done, lets prove that if we move Vbox1 (f1/3) from VLAN 10 to VLAN 50 it is then able to see Sec1.
R1#configure terminal
R1(config)#interface fastEthernet 1/3
R1(config-if)#switchport mode access
R1(config-if)#switchport access vlan 50
R1(config-if)#exit
R1(config)#exit
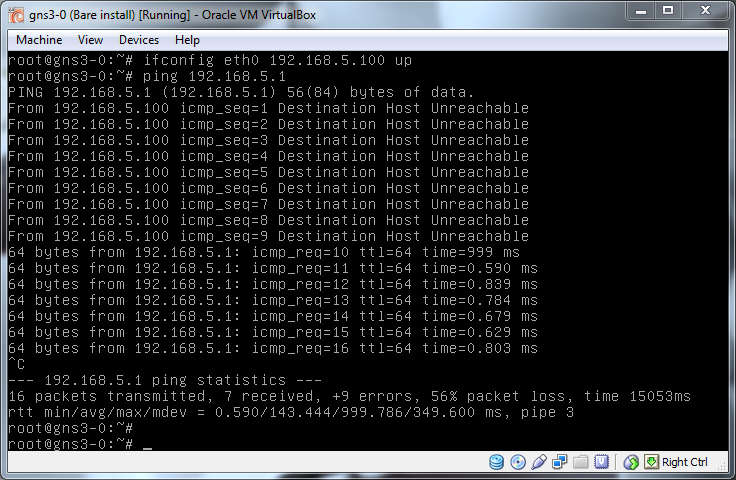
It takes a few seconds for the change to take affect but as soon as it does Vbox1 can now talk to Sec1 on it's subnet.
Access and Trunk Ports
So far each of the end points on the network have had their ports set to access mode not trunk mode, for a full explanation of the difference see this detailed write up by Cisco but as a snippet from that site says:
Ethernet interfaces can be configured either as access ports or a trunk ports, as follows:
- An access port can have only one VLAN configured on the interface; it can carry traffic for only one VLAN.
- A trunk port can have two or more VLANs configured on the interface; it can carry traffic for several VLANs simultaneously.
Basically, what that means is that a device on an access port has no idea about VLANs as the switch handles it all for it, the device is automatically put on the VLAN assigned to it and the switch will ignore any attempts to try to use a different VLAN ID. A trunk port on the other hand, hands all control of handling VLANs to the device connected to it meaning any traffic coming into that port should already be tagged up and ready to be passed onwards to wherever it should go. Access ports are designed to be used by end devices, PCs, printers etc, trunk ports are designed to be connected to other networking infrastructure such as switches.
As an attacker, if you are on an access port you are quite limited with what you can do with VLANs because of their built in restrictions but if you can get yourself onto a trunk port then the restrictions are lifted and you can do whatever you want. To prove this lets move Vbox1 onto a trunk port and see what we can do.
Changing from access port to trunk port is simple:
R1#configure terminal
R1(config)#interface fastEthernet 1/3
R1(config-if)#switchport mode trunk
R1(config-if)#exit
R1(config)#exit
Now lets change to Vbox1 and see what we can access:
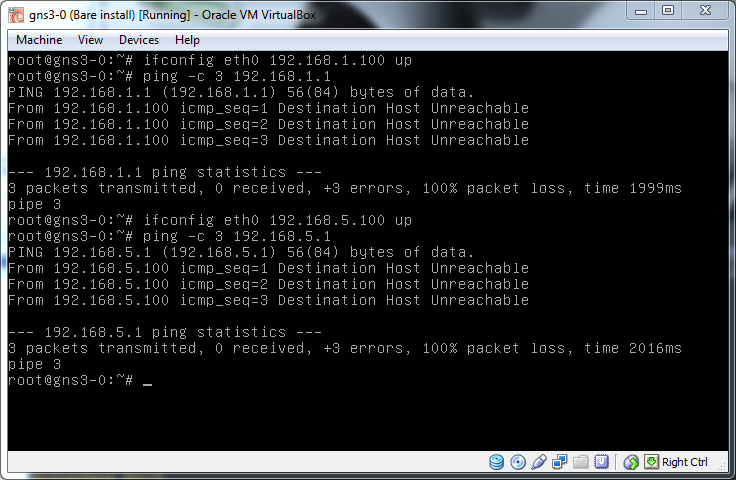
We can't ping anything, that's not good, I said we should be able to access everything. The problem is that we are sending traffic into the switch but not telling it what VLAN the traffic is for and so the switch is using what is known as the Native VLAN, this is a default VLAN where all untagged traffic is sent. I'll get into the security of that later but for now lets add some VLAN tags and get traffic moving.
If you've not rebooted Vbox1 since installing the vlan package you'll first need to load the 8021q kernel module:
modprobe 8021qNow lets put ourselves on some VLANs. The way this is done in Linux is to create a new virtual interface attached to the main connection where all traffic is tagged on its way out. When adding VLAN 10 to eth0 the new interface will be called eth0.10.
vconfig add eth0 10
ifconfig eth0.10
The new interface will also need an IP in the correct subnet but watch out here, if eth0 itself is also on that subnet things will get confused and it won't work so make sure you remove the IP from eth0 first. Note, you can't just take eth0 down as doing that also takes down all it's virtual interfaces.
ifconfig eth0 0.0.0.0
ifconfig eth0.10 192.168.1.100 up
Finally, check connectivity:
ping 192.168.1.1
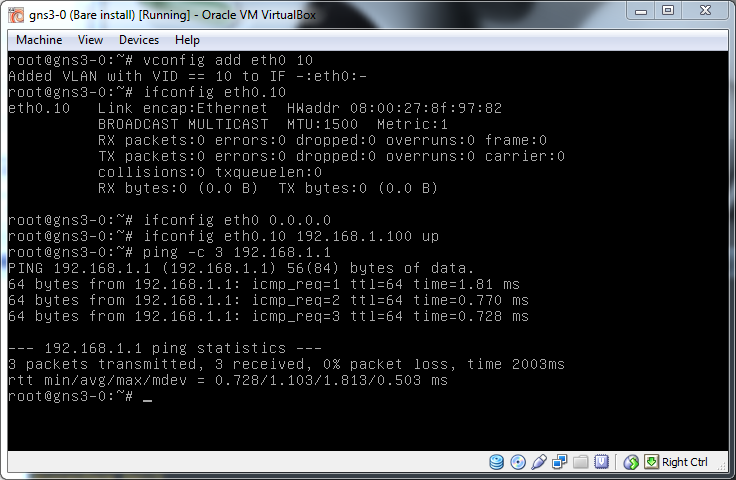
It works, the Linux network stack is adding the correct 8021Q tagging to the packets and they are flowing as expected.
From the description above a trunk port can handle more than one VLAN so lets bring up a second so Vbox1 can also talk to Sec1.
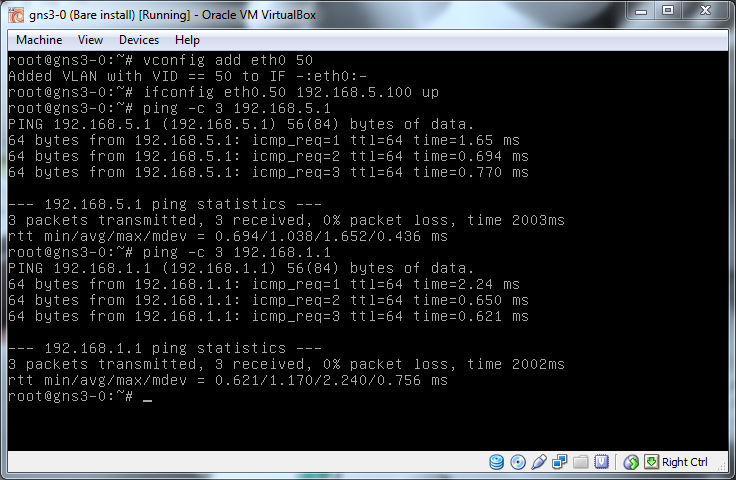
This is the power of being on a trunk port, we basically have access to whatever VLAN we want as we tag the traffic and the switch just trusts us.
The final bit of this problem, how to know what VLANs are out there to abuse. This is pretty simple, the network tells you, just watch broadcast traffic and you'll see the tagged traffic flowing around you. The most basic way to do this is with tcpdump:
tcpdump -nei eth0There are two important things here, the -e switch which adds the layer 2 headers:
-e Print the link-level header on each dump line.
And the fact you are dumping on eth0 not eth0.10 or any other already tagged interface.
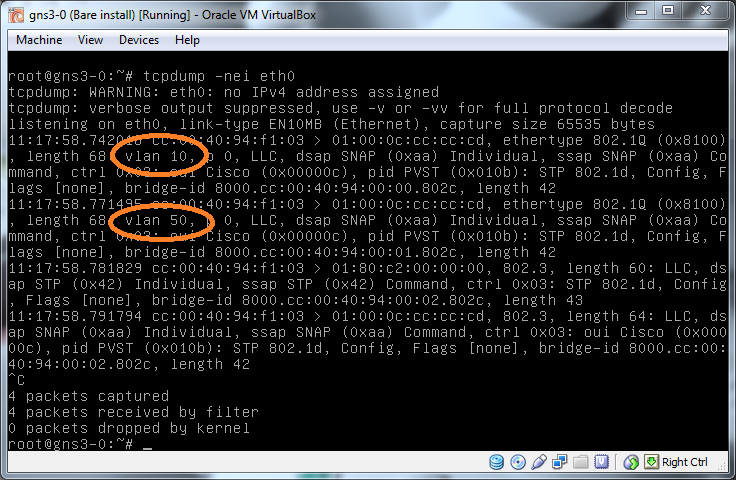
From this you can see the two VLAN IDs we have on this network so can then jump on to them and monitor them as you would a normal network to identify the IP range.
Summary
The lab now has two VLANs which have been shown to be working correctly, we can move between them the legitimate way by modifying the port tagging and we can abuse them if accidentally allowed access to a trunk port. In part 3 I'll look at the different protocols used to setup VLANs and ports and see if they can be abused to modify ports in our favour.
Thanks
Something I forgot to do at the end of part 1 was to say thanks to two people who both offered help, Joshua and Des, your encouragement and advice was very welcome.
Links
And finally a list of links which I found helpful in putting all this together. I've taken bits from all these in the process of building this lab.
